

How to Clean Handmade Silver Jewelry Safely
Table of Contents
- Why Handmade Silver Jewelry Needs a Different Cleaning Approach
- Materials You Need to Clean Handmade Silver Jewelry
- Gentle DIY Silver Cleaner Recipes That Won't Harm Your Jewelry
- Step-by-Step: How to Clean Handmade Silver Jewelry with Delicate Settings
- Why Does My Silver Ring Turn My Finger Green?
- How to Store Handmade Silver Jewelry to Prevent Tarnish
- When to Seek Professional Cleaning for Handmade Silver Jewelry
- Frequently Asked Questions
Last Updated: October 9, 2026
Why Handmade Silver Jewelry Needs a Different Cleaning Approach
Handmade silver jewelry needs a gentler approach than factory pieces because handcrafted work often has delicate soldered joints, one-of-a-kind stone settings, and intentional finishes that harsh cleaners strip away.
A mass-produced chain can survive a rough scrub. A handmade ring with a bezel-set gemstone cannot.
Sterling silver tarnishes through oxidation. Sulfur in the air bonds with the metal and creates a dark layer called tarnish. This is normal, not a defect.
- Patina is different from tarnish. It is a dark finish some makers add on purpose.
- Antiqued finishes live in recessed areas and should stay there.
- Abrasive cleaners erase both, and you cannot easily put them back.
So the goal is simple: remove tarnish, protect the finish, keep stones safe.
Materials You Need to Clean Handmade Silver Jewelry
Handmade silver is not one material. It is sterling silver (92.5% silver, 7.5% copper), sometimes plated, sometimes oxidized or antiqued, and almost always set with a stone, a soldered joint, or a glued setting. Your kit has to respect all of those at once, which is why the right tools matter more than the right recipe.
Household Items That Work
- Microfiber cloth, lifts residue without the scratching paper towels cause. Keep one dry for buffing, one damp for rinsing.
- Soft-bristled brush, a clean baby toothbrush or a dedicated jewelry brush. Nylon bristles, never a wire brush.
- Lukewarm water in a small glass or ceramic bowl. Skip metal bowls; they can react with the cleaner.
What to Avoid, and Why
Skip these, even though plenty of guides still suggest them:
- Toothpaste. Its abrasive grit (silica or calcium carbonate) scratches silver and dulls a polished surface. On an antiqued piece, it erases the dark recessed detail in one pass.
- Vinegar soaks. Acetic acid pits metal over time and attacks the copper in sterling silver faster than the silver itself. It also damages porous stones like opal, pearl, and turquoise.
- Lemon juice and salt. Same acid problem, plus salt accelerates corrosion at soldered joints.
A Note on Handmade vs. Mass-Produced Construction
Mass-produced silver is stamped, machine-polished, and set with uniform prongs. Handmade silver is often soldered at multiple joints, set with hand-fitted stones, and finished with a patina the maker applied on purpose. That means:
- Soldered joints are the weakest point. Heat, acid, and ultrasonic vibration all stress them.
- Hand-set stones may sit in a bezel or prong setting that is slightly less uniform than a factory setting. A loose stone is a real risk.
- Intentional finishes (oxidized, antiqued, brushed, matte) are part of the design. Abrasive cleaners remove them.
If you are unsure what finish or setting your piece has, treat it as delicate. Gentle soap and water is almost never the wrong first move.
Gentle DIY Silver Cleaner Recipes That Won't Harm Your Jewelry
Two methods cover almost every situation: a chemical reaction to lift tarnish, and plain soap and water for light cleaning.
Baking Soda and Aluminum Foil Method
This method works through a simple ion exchange. Tarnish moves from the silver to the foil, and the silver comes out bright.
- Line a glass dish with aluminum foil, shiny side up.
- Add one tablespoon of baking soda.
- Pour in hot (not boiling) water and stir.
- Lay the jewelry flat on the foil. Do not let pieces touch each other.
- Wait 2-3 minutes. Check progress.
- Lift the piece out with tongs or a plastic spoon.
- Rinse under lukewarm water.
- Dry with a microfiber cloth.
This works well on plain silver bands. It is a poor choice for pieces with porous stones like opal, turquoise, or pearl.
Dish Soap and Lukewarm Water Method
For everyday buildup, this is the safest option.
- Add two drops of mild dish soap to a bowl of lukewarm water.
- Let the piece soak for 5 minutes.
- Brush gently with a soft-bristled brush.
- Rinse well. Residue left behind looks like tarnish.
- Dry completely with a microfiber cloth.
Step-by-Step: How to Clean Handmade Silver Jewelry with Delicate Settings
Cleaning handmade silver jewelry with delicate settings takes about 10 minutes and a light touch: clean the metal, protect the stone, never scrub a setting.
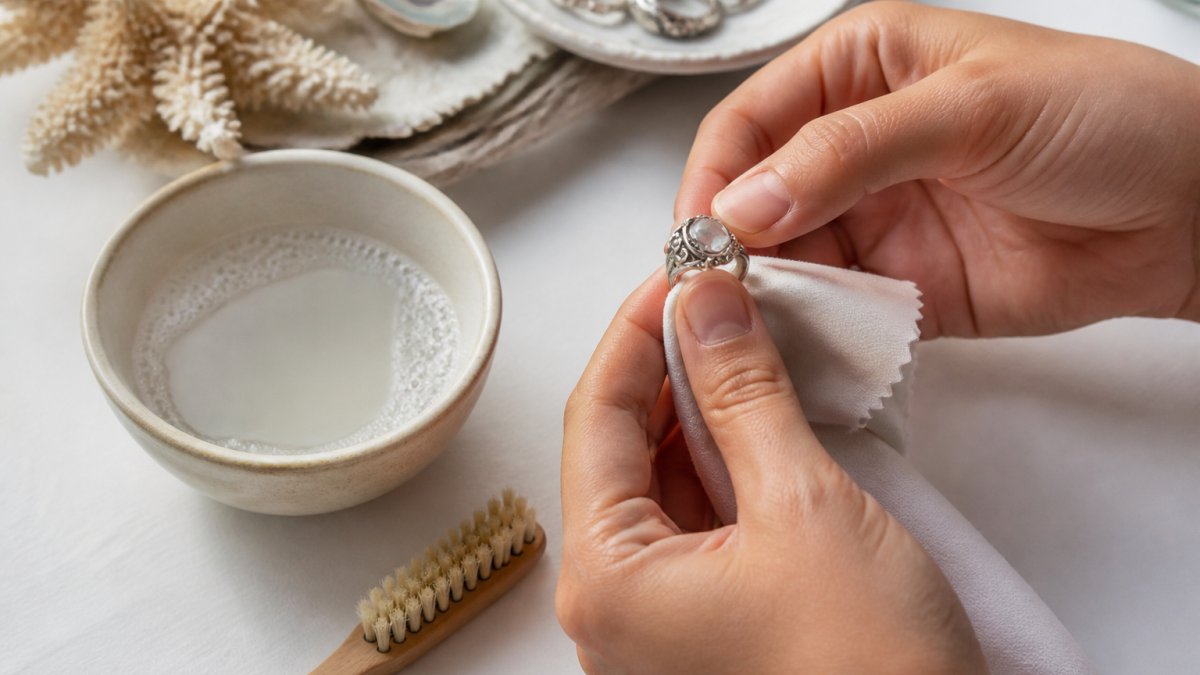
- Inspect the setting before you get it wet. Look for loose prongs, a wobbly stone, or a gap between stone and bezel. If the stone moves at all, stop and see a jeweler, soap and water wick into a loose setting and leave residue behind.
- Check the soldered joints. Run a fingernail lightly along each joint. A crack, a pit, or a rough edge means the piece should not go into water or an ultrasonic cleaner.
- Identify the stone and the finish. This decides your method. A polished band with no stone can handle the foil method. A bezel-set opal cannot.
- Use the soap method for anything with a gemstone, a glued setting, or an oxidized finish.
- Brush the metal only. Keep the brush off the stone surface. Use short, light strokes, never scrub back and forth across a prong.
- Rinse with lukewarm water, never hot or cold. Sudden temperature changes can crack a stone or stress a soldered joint.
- Dry with a microfiber cloth, then air-dry a few minutes before buffing. Trapped moisture under a stone commonly causes cloudy film.
- Buff lightly with a polishing cloth to restore shine. Do not press hard on the stone or the setting.
Protecting Gemstones and Porous Stones
Gemstone safety is the part most guides skip. Hard stones like diamond and sapphire handle gentle soap fine. Soft and porous stones do not. The table below is a starting point, not a substitute for knowing your specific stone.
| Stone Type | Water Safe? | Best Method |
|---|---|---|
| Diamond, sapphire, ruby | Yes | Soap and soft brush |
| Amethyst, citrine, garnet | Brief only | Damp cloth, dry fast |
| Larimar, moonstone, turquoise | No | Dry cloth only |
| Opal, pearl, amber, coral | No | Dry cloth only |
| Any glued-in stone | No | Dry cloth only |
Larimar, the stone in our Element Ring and Balance Ring, is a softer gem. Keep water contact short and dry it right away. If you are unsure whether a stone is porous, assume it is.
The Element Ring - Larimar | Handmade Silver Ocean Inspired Ring // Size 7 →

The Handmade-Specific Risks Most Guides Miss
This is where handmade jewelry differs from a factory chain, and where a generic guide can damage your piece:
- Loose soldered joints. Repeated heating and cooling (like the hot-water foil method) stresses a joint over time. If your piece has visible solder lines, stick to room-temperature soap and water.
- Glued settings. Many handmade pieces use jeweler's epoxy rather than prongs. Warm water softens some adhesives. Keep water lukewarm at most, and never soak a glued setting for more than a minute or two.
- Oxidized and antiqued finishes. The dark recesses are intentional. Abrasive polish, silver dips, and ultrasonic cleaners all remove them. Clean the raised metal only, and never polish the recessed areas.
If Cleaning Fails: Troubleshooting
Sometimes you follow every step and the piece still looks wrong. What each result usually means:
- The silver stays black after two gentle attempts. The tarnish may be heavy, or a plated finish may have worn through. Do not escalate to stronger chemicals, abrasive polish removes a thin layer of silver each time, and on plated pieces makes it worse.
- A cloudy film appears after cleaning. This is almost always dried soap residue or trapped moisture. Rinse again with lukewarm water, dry thoroughly with a microfiber cloth, and let the piece air-dry before buffing.
- The stone looks duller than before. You may have used a cleaner that is too harsh for a porous stone. Stop cleaning, dry the piece, and consult a jeweler.
Why Does My Silver Ring Turn My Finger Green?
A green mark on your finger is not a sign of fake silver. It is a normal reaction between silver, moisture, and your skin's acids, the green comes from copper, part of every sterling silver alloy.
Common triggers:
- Hand lotion, sunscreen, or soap left on the skin
- Sweat during workouts or hot weather
- High humidity
A thin layer of clear polish inside the band can help. So can drying your hands fully before putting rings on. If the mark bothers you, clean the ring more often and keep the inside of the band dry.
How to Store Handmade Silver Jewelry to Prevent Tarnish
Storing handmade silver jewelry to prevent tarnish comes down to three things: dry air, low sulfur, and no rubbing. Tarnish is atmospheric exposure at work, so cutting off air contact slows it.
- Store each piece in its own storage pouch or a zip bag.
- Add an anti-tarnish strip to each bag. Replace it every few months.
- Keep pieces apart so they do not scratch each other.
Preventative maintenance beats deep cleaning every time. A quick wipe after each wear takes ten seconds and saves you a full cleaning session later.
When to Seek Professional Cleaning for Handmade Silver Jewelry
Most routine cleaning is a home job. Some situations are not.
Go to a jeweler when:
- Stones sit in delicate settings that feel loose
- The piece has soldered joints that look cracked or pitted
- Tarnish will not lift after two gentle attempts
If a home method fails, do not escalate to stronger chemicals. Repeated scrubbing with an abrasive polish removes a thin layer of silver each time. Do that often enough and you wear through the plating on soldered areas.
Frequently Asked Questions
How often should you clean handmade silver jewelry?
Clean your handmade silver jewelry every two to four weeks if you wear it regularly, or whenever you notice dullness or a faint yellow tint. Pieces worn daily near sweat, lotion, or humidity need more frequent gentle cleaning. For jewelry you store away, check it monthly and give it a quick polish with a microfiber cloth to stop tarnish from setting in. Overcleaning with harsh methods does more harm than good, so stick to gentle soap and water for routine care.
Do baking soda and aluminum foil damage silver?
The baking soda and aluminum foil method is generally safe for plain sterling silver because it reverses tarnish through a chemical reaction without scrubbing. However, it can damage pieces with porous gemstones like Larimar or moonstone, antiqued finishes, or delicate soldered joints. Never use it on jewelry with glued settings or pearls. If your piece has gemstones or a patina you want to keep, choose the dish soap and lukewarm water method instead.
Can you use a toothbrush to clean handmade silver jewelry?
A soft-bristled toothbrush works well for reaching crevices in handmade silver jewelry, but only use one labeled soft and apply very light pressure. Avoid medium or hard bristles, which can scratch sterling silver and loosen delicate settings. Dip the brush in lukewarm soapy water and gently scrub around prongs and textured areas. Rinse thoroughly and dry with a microfiber cloth. For pieces with porous stones, skip the toothbrush and use a cotton swab instead.
What is the difference between silver and sterling silver?
Pure silver is 99.9% silver, which is too soft for everyday jewelry. Sterling silver is 92.5% silver mixed with 7.5% other metals, usually copper, to make it durable enough for rings, bangles, and cuffs. The copper content is why sterling silver tarnishes over time when exposed to sulfur in the air. Sterling silver pieces benefit from gentle cleaning and proper storage to slow oxidation.
Silver jewelry care is not complicated, but it does reward attention. Tarnish, oxidation, and green fingers are all manageable when you use the right method for the right piece. Inner Wild Jewelry makes every piece by hand in sterling silver, from the Larimar Element Ring to the Ghost Tide Bangle, so each one deserves a cleaning routine that respects its stones and its finish. Shop the collection and find a piece made to be worn for years, not seasons.